ONLINE HELP PRESTASHOP

SHORT INSTRUCTIONS - Help to start managing your webpage.
General instructions for assistance:
a. Follow the arrow ![]() or the hand
or the hand ![]() on the photos in order to navigate in the right spot.
on the photos in order to navigate in the right spot.
b. With the green numbering (eg 1b) will see additional options within each "Catalog"
c. During the registration process, if your page is in multiple languages, press the flag next to the input box and select the flag of the language you want to import.
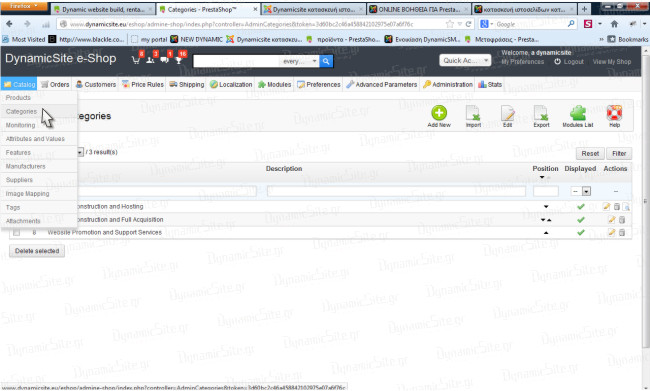
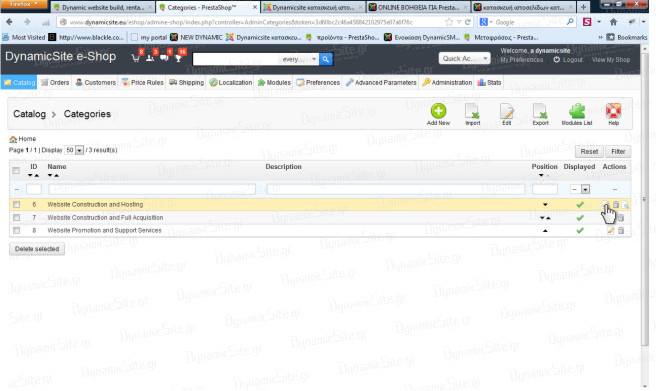
A. PRODUCT CATEGORIES To create categories go to menu Catalog > Categories. This refers to the indoors categories. To display the categories the left menu will automatically see them whereas for the top menu you should do assignments and this is done from the menu modules > Leo bootstrap megamenu or from the menu modules > Top horizontal menu, depending on the template can be different module and will inform you in your website's activating email. ¤¤¤¤¤¤¤¤¤¤¤ Then go to "Add New" to add a new category or the pencils to enter a category options. ¤¤¤¤¤¤¤¤¤¤¤ 1a. Name: To add or change type the desired name in this position. CAUTION! You should have selected the corresponding flag with the language loading (eg the Greek for Greek, the American for English etc.) 1b. Parent category: Select if you want the category to be basic (must be selected in the category Home and Root) or whether they are a subclass (select the name of the base eg Website Construction & Hosting) 1c. Description: Type a brief description for the category. 1d. Picture: Go to button browse ... (see Once manage your settings press Save.
B. ATTRIBUTES & VALUES If your products do not have properties Go directly to Products Originally needs a preparation on the properties of the products (eg in clothes would make sense to build in advance the names of properties, such as color, size. Good to prepare all properties for all your products from the beginning. To add or change properties go to menu Catalog> Attributes and Values Then within each product you can select only those properties that are required and not all. So in a product you can just put selector size and not paint or put the two or more combinations of properties. ¤¤¤¤¤¤¤¤¤¤¤ Initially We make each property by clicking on the To change property values in each property to the far right you will see a cross and if you press it you will see all the prices of the property in detail and there from the column [position] you can change display order, deletions and alterations. ¤¤¤¤¤¤¤¤¤¤¤ After clicking on the 2a. Type attribute: eg color 2b. Value: eg Black 2c. Colour: find the color code from the color chart 2d. Texture: upload a picture of your copmuter with a sample of the color Once manage your settings press Save.
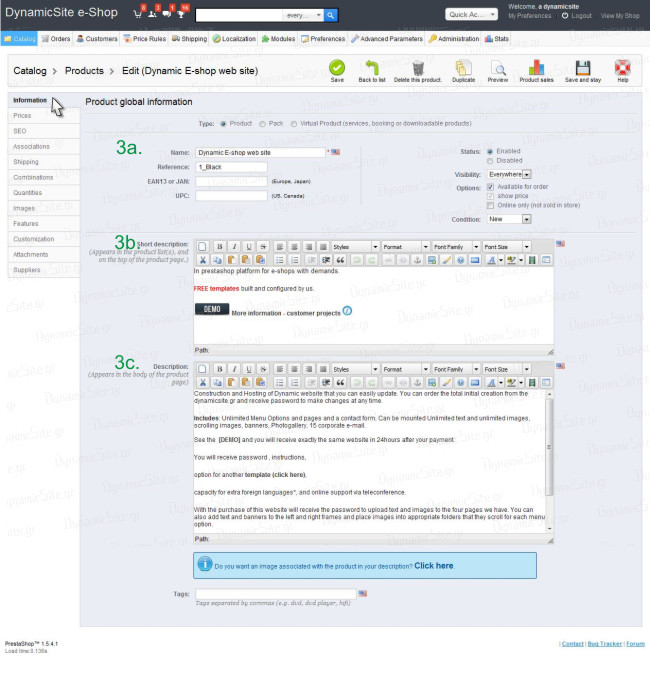
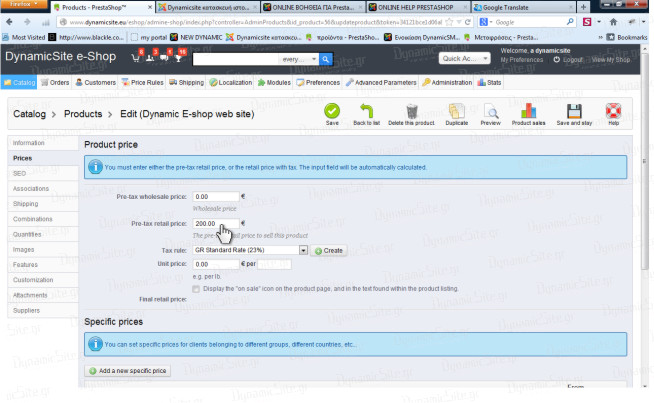
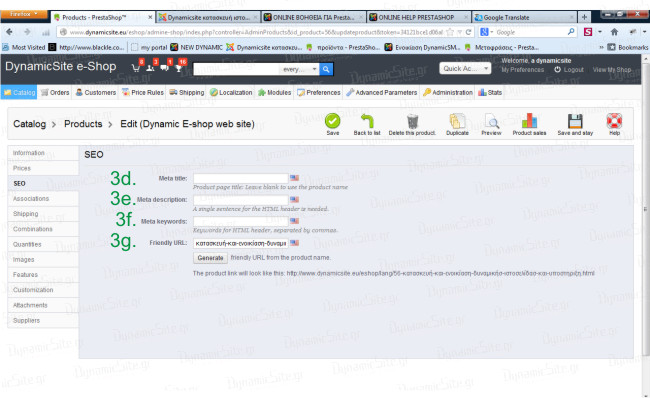
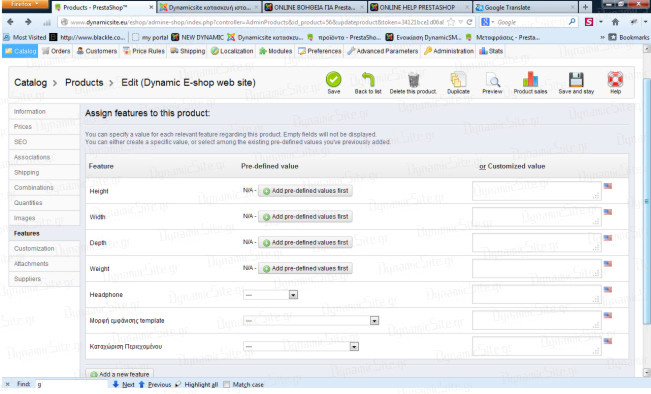
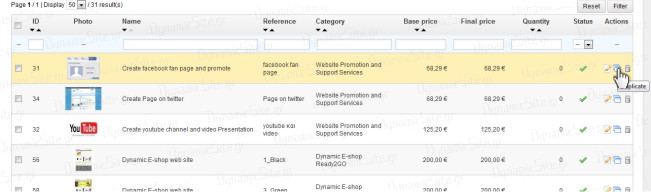
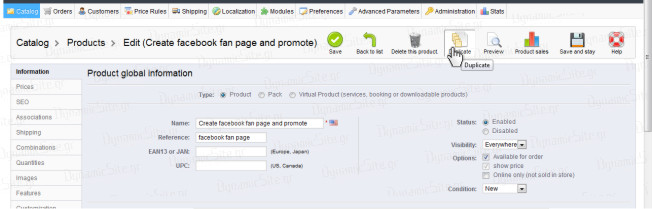
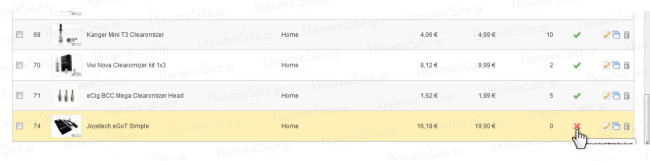
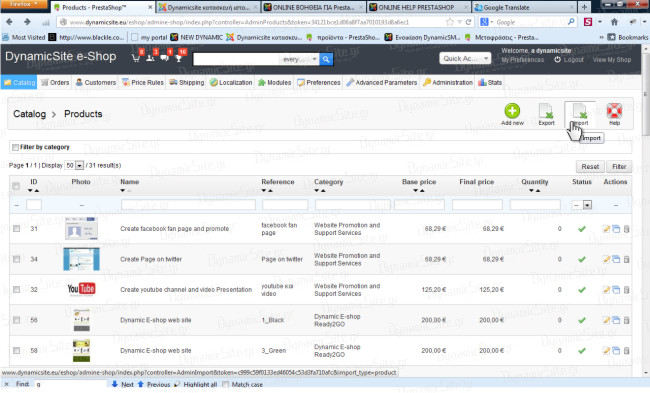
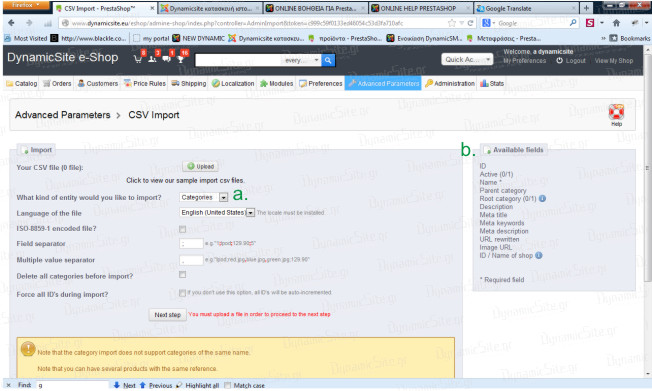
C. PRODUCTS Below we describe three modules in the manual adding of a product, cloning a product and addition products of an electronic data file. C1. Manually adding product For product registration go to menu Catalog> Products and then click ¤¤¤¤¤¤¤¤¤¤¤ In each product you have left Tabs for information, prices, for Attributes, SEO for keywords, images, etc. 1. information 3a. Name: enter the name of the product. Reference: enter product code 3b. Brief Description: enter a short description for the product. 3c. Description: enter an extended description of the product In <Tags> you have the ability to make a second parallel classification. It is not necessary to press <Save> for each change you make. You can select the left menu (eg SEO, Pictures etc) and some time you can make <Save and Stay> ¤¤¤¤¤¤¤¤¤¤¤ 2. Prices Here you can enter the value of the product. First select the <Tax rule> and then put the <Pre-tax retail price> and press Enter. If you do not find the correct VAT or has been changed, go to menu Lovalizations > Taxes ¤¤¤¤¤¤¤¤¤¤¤ 3. Accociations In the Accociations tab you can connect the product to one or more categories simply by checking the corresponding boxes, but also to connect with other products (see ¤¤¤¤¤¤¤¤¤¤¤ 4. Images Here you can upload one or more images of the product. If you do not see the options you have to press <Save and Stay> (see Then press the button <Upload an image>, you select from your computer the product image/s you want to upload and click <Open>. The picture that is checked is the cover photo, while the others will appear into the product. ¤¤¤¤¤¤¤¤¤¤¤ 5. SEO SEO for keywords etc for better positions in google. Here you put in the Meta Title (3d) the product name or a few words yet, and will appear in the browser up top, Meta Description (3e) put a slogan on 2 lines, in Meta Keywords (3f) up to 15 words - phrases keywords separated by a comma and a space and the Friendly URL (3g): insert or product name or boosters and other keywords. This will be coming out in the url when the page normally uploaded at the end in your domain. ¤¤¤¤¤¤¤¤¤¤¤ 6. Combinations Here you can set all the product variations for color, size etc and thus make all the combinations that will be sold. In TAB combinations you press <Product combinations generator> and shows you all the properties and groups who have entered on your website. (see section B. Attributes and Values). In the left column select, with "ctrl" button pressed, attribute to add to the product and validate by pressing <add> button. If a property increases the value or weight of the product enter the price difference or weight (see ¤¤¤¤¤¤¤¤¤¤¤ 7. Quantities This environment allows you to manage the available for sale, product quantities and combinations for this store. ¤¤¤¤¤¤¤¤¤¤¤ 8. Features This category helps for comparing products. You can specify a value for each relevant feature for this product, empty fields will not appear. You can either create a specific value or select among existing default values that you previously added to the menu Catalog > Features ¤¤¤¤¤¤¤¤¤¤¤ C2. Cloning Product If in your store there are products of a class with similar features, you can create a product and cloning. Then in each clone you can make all the necessary changes (such as name, reference, image) The cloning can be done in two ways: A. by clicking on the mark with the two tabs on the products right tab (see ¤¤¤¤¤¤¤¤¤¤¤ or B. by clicking into the product that you want to clone, the "Duplicate" button (see In any case you should then activate the clone product by clicking on the red X in order to activate. ¤¤¤¤¤¤¤¤¤¤¤ C3. Add products by an electronic data file If you have or you can prepare an electronic file of your trade program or if you provide your supplier, then the CSV import page allows you to easily fill the list of your products. Simply press <Import> ¤¤¤¤¤¤¤¤¤¤¤ You should have prepared a CSV file (done with the excel) and you will have as columns the data fields (see b.) that you see right in the dialog depending on what type of file you want to import, and the selection you have to do (see a.). Dynamicsite provides bulk import data from €100 + VAT and upon request.
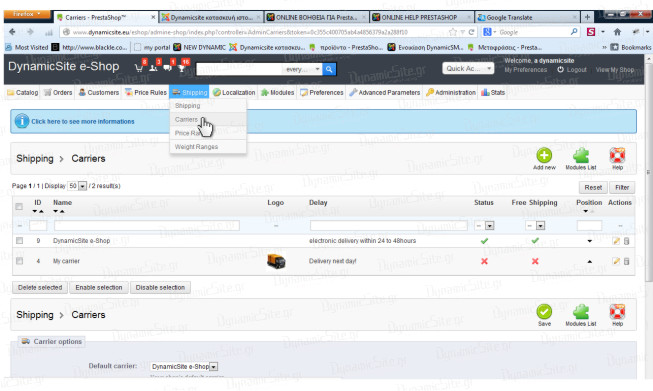
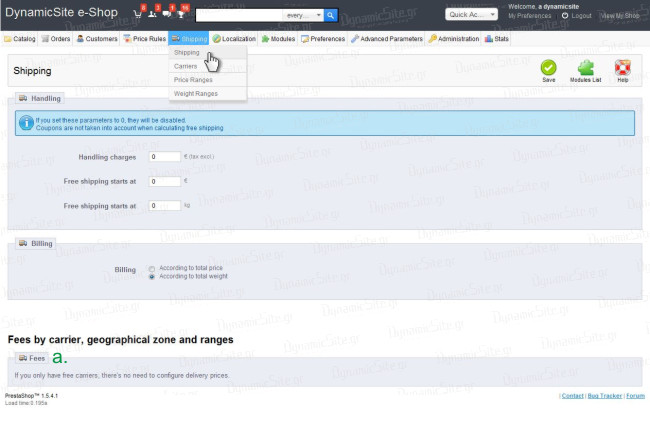
D. SHIPPING D1. To make arrangements to transport costs go first to the Location menu to set: ¤¤¤¤¤¤¤¤¤¤¤ D3. In the menu Shipping> Weight Ranges create a range of weight values. On the a. Carrier: pick from a carrier that you put on the menu Shipping>Carrier Follow the same procedure for the remaining margins weight (ie. From 2kg - To 5kg) etc. ¤¤¤¤¤¤¤¤¤¤¤ D4. In the menu Shipping > Shipping choose the carrier (a.) to display the table of all defined settings (zone / area, weight, etc) and you can add the cost changes in their respective fields.
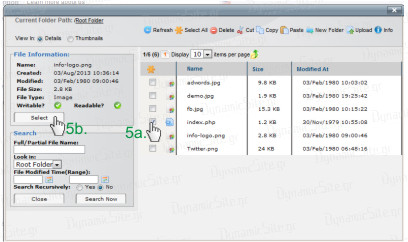
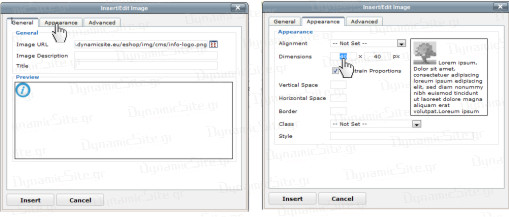
E. EDIT TEXT AND INSERT IMAGE INTO TEXT Word processing is done exactly as in a text editor program (eg word). Above the text input box there is a toolbar where you can select a font and font size, alignment, type (Bold, Italic, etc.) to put unorder list ¤¤¤¤¤¤¤¤¤¤¤ E1. INSERT IMAGE If in a text editing you wish to insert images, go to the icon ¤¤¤¤¤¤¤¤¤¤¤ and in the window that opens press the button ¤¤¤¤¤¤¤¤¤¤¤ Will open a new window in which you can enter your images by clicking ¤¤¤¤¤¤¤¤¤¤¤ Choose the image you have uploaded tick the relevant box (5a) and press Select (5b)> Insert. Now the photo inserted in the text and you can edit it. ¤¤¤¤¤¤¤¤¤¤¤ Resizing images The change of dimension of an image can be done in two ways: A. after Select (5b previous step) go to the Appearance button click Dimensions and type the desired dimension in px (pixel). After that, you press Insert and the photo will be inserted in the dimensions entered. ¤¤¤¤¤¤¤¤¤¤¤ b. clicking on the image will display a frame around it. Going the mouse on one corner will display two arrows ¤¤¤¤¤¤¤¤¤¤¤ E2. Insert link Open in a new window the page you want to link and do copy the url (eg http://www.eshopready2go.eu/prestashop-templates/demo-1-5/demo0001). To enter the link in the text or a picture, choose where you want to be a link and press the button ¤¤¤¤¤¤¤¤¤¤¤ In the window that opens you enter in a. Link URL: the url you copied. Then in b. Target: select Open in new window (_blank) and Insert.
![]() ) to upload from your computer a photo representative of the class.
) to upload from your computer a photo representative of the class.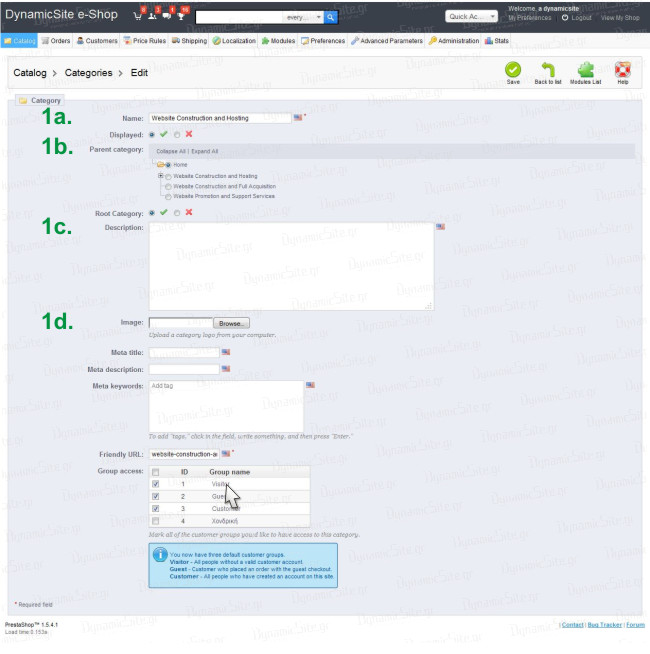
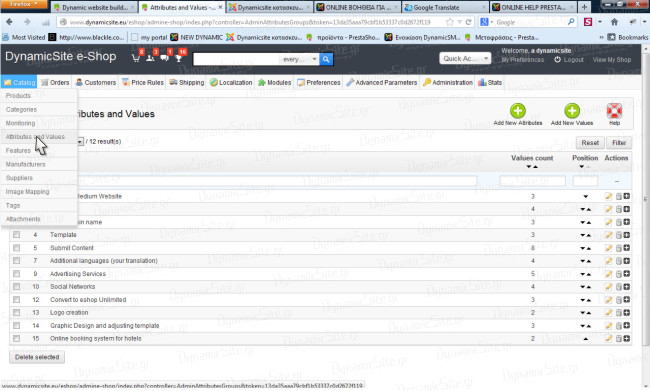
![]() <Add new Attributes> in top with the name eg Color, Size, etc.
<Add new Attributes> in top with the name eg Color, Size, etc.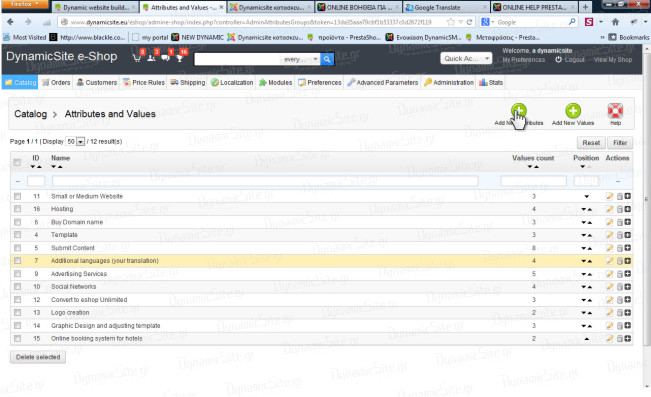
![]() <Add New Values> put the corresponding values, ie choosing
<Add New Values> put the corresponding values, ie choosing 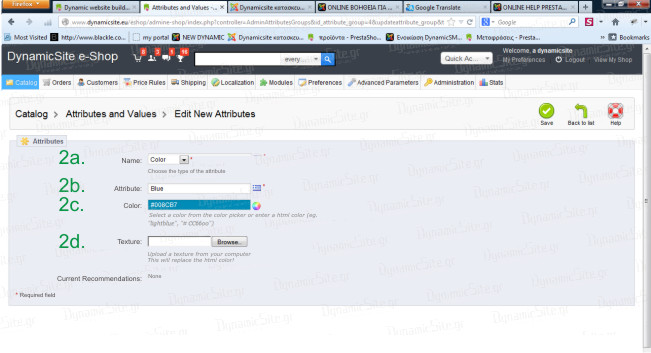
![]() [Add New] that is in the right top.
[Add New] that is in the right top.
![]() ) that will appear as an accessory (just start typing the name of the product accessories and is displayed automatically to select it).
) that will appear as an accessory (just start typing the name of the product accessories and is displayed automatically to select it).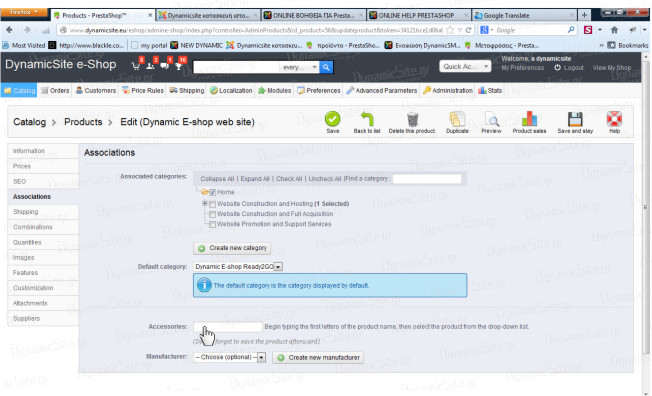
![]() ) upper right.
) upper right.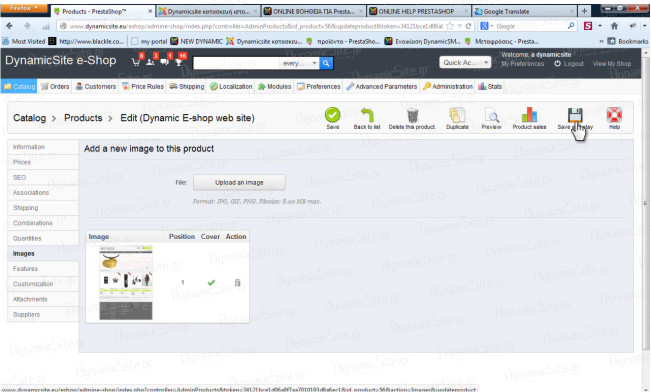
![]() ) and press the <Generate this Combinations> button.
) and press the <Generate this Combinations> button. 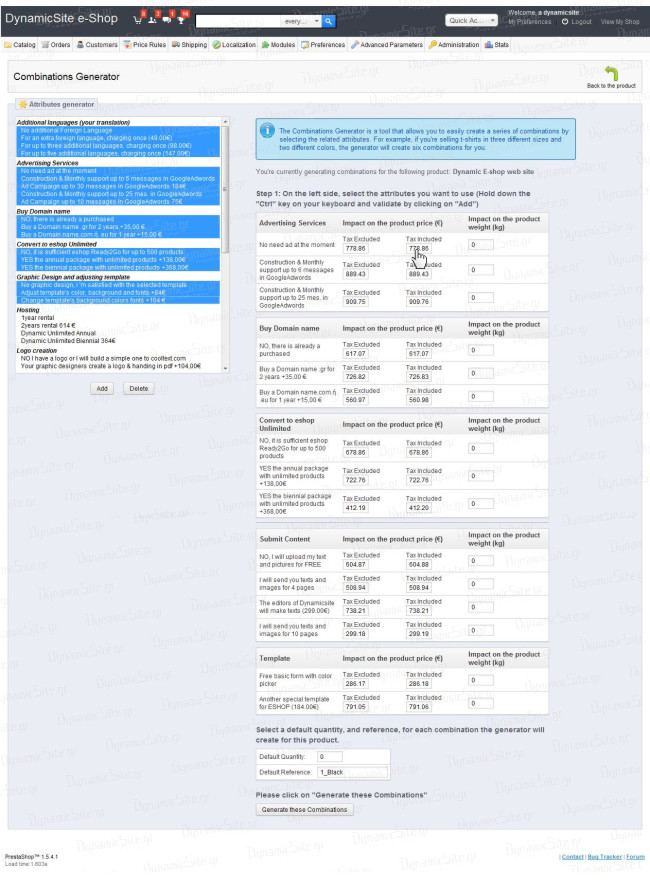
![]() )
)
![]() )
)
c. States (here specify the name of the county or area eg "Florida")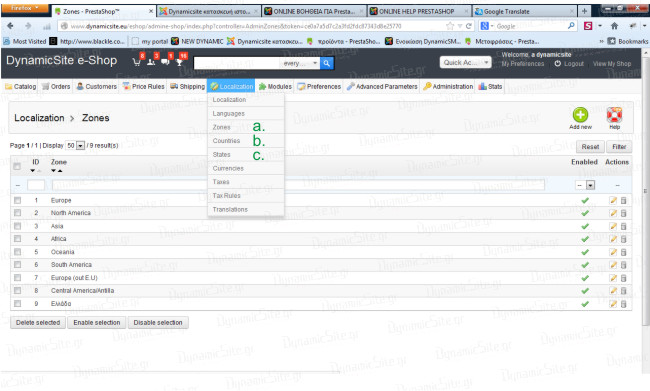
![]() [Add New] button appearing three options.
[Add New] button appearing three options.
b. From: The lowest price range (eg 0.000kg).
c. To: The highest range (eg 2.000kg)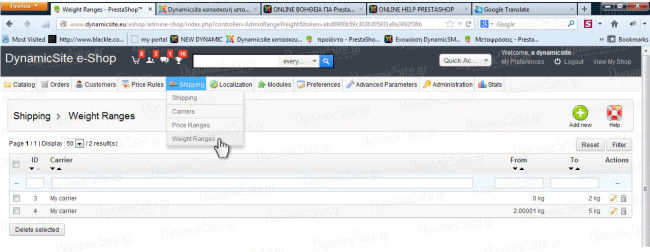
![]() or ordered list
or ordered list ![]() , select text color
, select text color ![]() or background color
or background color ![]() , insert image
, insert image ![]() , link
, link ![]() etc.
etc.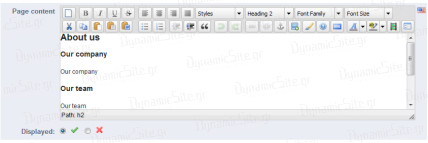
![]() Insert / Edit image
Insert / Edit image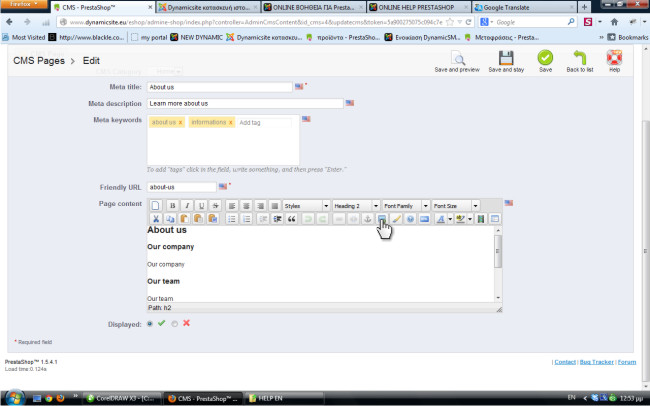
![]() browse
browse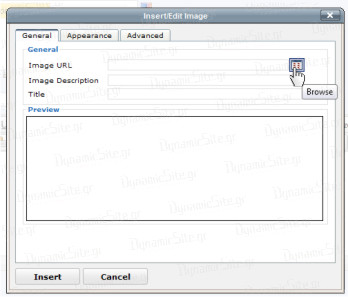
![]() Upload> browse ... , find from your computer the photo you want to upload and click open> upload and then just tap close.
Upload> browse ... , find from your computer the photo you want to upload and click open> upload and then just tap close.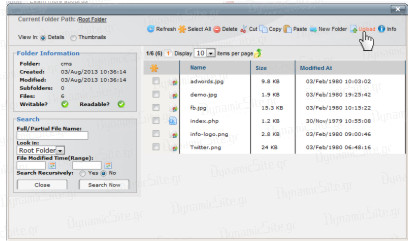
![]() , pressing straight click and dragging outward or inward, you can enlarge or reduce the photo.
, pressing straight click and dragging outward or inward, you can enlarge or reduce the photo.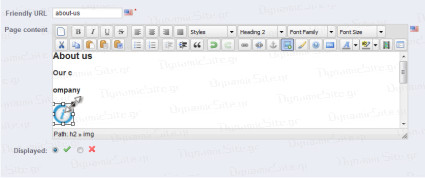
![]() Insert / Edit link.
Insert / Edit link. 

Γενικές οδηγίες για τη βοήθεια: - See more at: http://www.dynamicsite.gr/%CF%85%CF%80%CE%BF%CF%83%CF%84%CE%B7%CF%81%CE%B9%CE%BE%CE%B7/online-%CE%B2%CE%BF%CE%B7%CE%B8%CE%B5%CE%B9%CE%B1/online-%CE%B2%CE%BF%CE%B7%CE%B8%CE%B5%CE%B9%CE%B1-%CE%B3%CE%B9%CE%B1-prestashop.html#sthash.lkiTBe4e.dpuf
Γενικές οδηγίες για τη βοήθεια:
α. Ακολουθήστε το βέλος
β. Με την πράσινη αρίθμιση (πχ. 1b) θα δείτε τις επιπλεόν επιλογές μέσα σε κάθε "Φίλτρο"
γ. Κατά την διαδικασία καταχώρησης, αν η σελίδα σας είναι σε πολλές γλώσσες, πατάτε στην σημαία δίπλα από το πλαίσιο εισαγωγής και επιλέγετε την σημαία της γλώσσας που θέλετε να εισάγετε. - See more at: http://www.dynamicsite.gr/%CF%85%CF%80%CE%BF%CF%83%CF%84%CE%B7%CF%81%CE%B9%CE%BE%CE%B7/online-%CE%B2%CE%BF%CE%B7%CE%B8%CE%B5%CE%B9%CE%B1/online-%CE%B2%CE%BF%CE%B7%CE%B8%CE%B5%CE%B9%CE%B1-%CE%B3%CE%B9%CE%B1-prestashop.html#sthash.lkiTBe4e.dpuf